Creating a Tumblr Bot with C#
I've made a few posts on how to create a Tumblr bot with Ruby. Ruby is great and all, but it is definitely an odd language, and it works best on Mac/Unix computers. Because most people have Windows, and many programmers start with Java (a language very similar to C#) I thought it would be a good idea to "port" the tutorial over.
Setup
You're going to need Visual Studio 2015 and a Windows PC. (Note - you can use Xamarin as well, but I won't be showing how to get around in Xamarin!) This is a pretty big download, so it might take a while. In the meantime, you can read through the tutorial so you can be extra-ready.
Make sure you install the visual c# component of Visual Studio. It should be selected by default.
Project Files
As always, I have project files! If you'd prefer to follow along instead of writing everything from scratch, you can download the files. I've decided to host them on gist, since they're relatively small. Here's what our project will look like when completed:
If you want to add them to your project, you still need to follow the next section.
Setting up the Solution
In Visual Studio, create a new application with File > New > Project. Select Visual C# in the tree view, and Console Application. Finally, name your application whatever you want. Press OK to create the project.

If you're using the pre-made project files, add them to your solution now! If not, skip this paragraph. Change the
namespaceto your project name. For instance, if your project was namedMyCoolBot, change thenamespacein both files so it looks likenamespace MyCoolBotinstead ofnamespace TumblrBotUtilities.
Great, so we have our project set up. Let's create a class to hold our Tumblr client for easy use. Right click our project in the Solution Explorer and go to Add > Class. Call this class Tumblr.
Let's open our Tumblr class. It should be very basic.
We want to be able to access this class from anywhere without needing an instance, so let's make sure this is a static and public class.
Before we continue, we need to get a code library from NuGet.
Getting NewTumblrSharp
NewTumblrSharp is a continuation of an older C# Tumblr library that I've taken upon myself to maintain. You're going to need it to use Tumblr in C#. Go ahead and click the Project tab, and then Manage Nuget Packages. Search for New TumblrSharp and install the NewTumblrSharp library. Make sure you don't install the old TumblrSharp library!
Awesome, we can now continue!
Authenticating our Bot
Let's switch back to our Tumblr.cs file. At the top of the file, we're going to add two using statements.
using .;
using ..;
So, together, the file should look like this:
using .;
using ..;
These using statements allow us to use the TumblrSharp library in our Tumblr class.
Our Tumblr class is going to hold the Tumblr client used to make API requests (like answering asks, making posts, etc.) Before we can make any requests, however, we need to get some authentication tokens. I go into depth on how to get oauth tokens here, so read up if you need a refresher.
Once we have our consumer key & secret and oauth token & secret, we're going to using them in our code.
NOTE: these keys allow access to your Tumblr account! Treat them like a password and don't share them with anyone. Don't share your code with anyone either! These introductory scripts are made for your own educational use. Authenticating users and distributing code requires a far different process.
Let's add four new constants in our Tumblr class, and set them to the respective values we got from authenticating. Your file should look like this, with KEY HERE replaced with a correct value.
Now that we have all necessary keys, we can create a Client. We're going to create a publicly accessible property - Client - from which to access this class. We're also going to create a publicly accessible property called BlogName that is initialized with the name of our Bot's blog. In my case, it was "somethinginterestingbot".
If that wasn't a mouthful, we're also going to create a static initializer with static Tumblr(){ ... }. All this really does is allow us to do some special stuff when the program starts. Here's where we're at.
Okay! We're almost done with the Tumblr class, we just need to add a few more lines to set our Client. Inside the static Tumblr() initalizer, add the following code.
static
{
Client = .;
}
What we're doing here is simply creating a new Client with the values and tokens we got from our previous steps.
Now that our Client is initialized, we can focus on our bot! The hard part is over. Switch over to your Program.cs
Publishing an Ask
Here it is! Here's everything you should have in your Program.cs. Don't worry, I'll explain everything in a second.
Note: go ahead and enable Asks for your bot's Tumblr account, and send it something.
That's a lot of stuff! But we know what most of it does. static void Main(string[] args) is just the entry point for our program - it was generated for us when we created the project.
In our Main method, we have our first API call!
var inbox = Tumblr.Client..Result;
This reads pretty easily - We're getting all submission posts (read: asks) from our blog, and setting it to the variable inbox. We pass in Tumblr.BlogName into the GetSubmissionPostsAsync call because Tumblr needs to know what blog from which to fetch messages. In my previous example, I set Tumblr.BlogName to somethinginterestingbot.
Let's move on...
foreach
This is a standard foreach look. Because our GetSubmissionPostsAsync returned a list of asks, we need to loop through that list and deal with each submission individually. In this loop, each individual message will be referenced with the variable message.
var msg = message;
When we call GetSubmissionPostsAsync, we actually get a bunch of generic instances of a class called BasePost. This isn't too helpful for answering questions, so we need to cast our message to the AnswerPost type. If you don't understand what casting does, don't worry too much - but it can't hurt to do some research on casting, either!
Finally - the meat of our program -
Tumblr.Client.;
I'm going to steal the nice graphic from my Ruby tutorial to explain what's going on here -
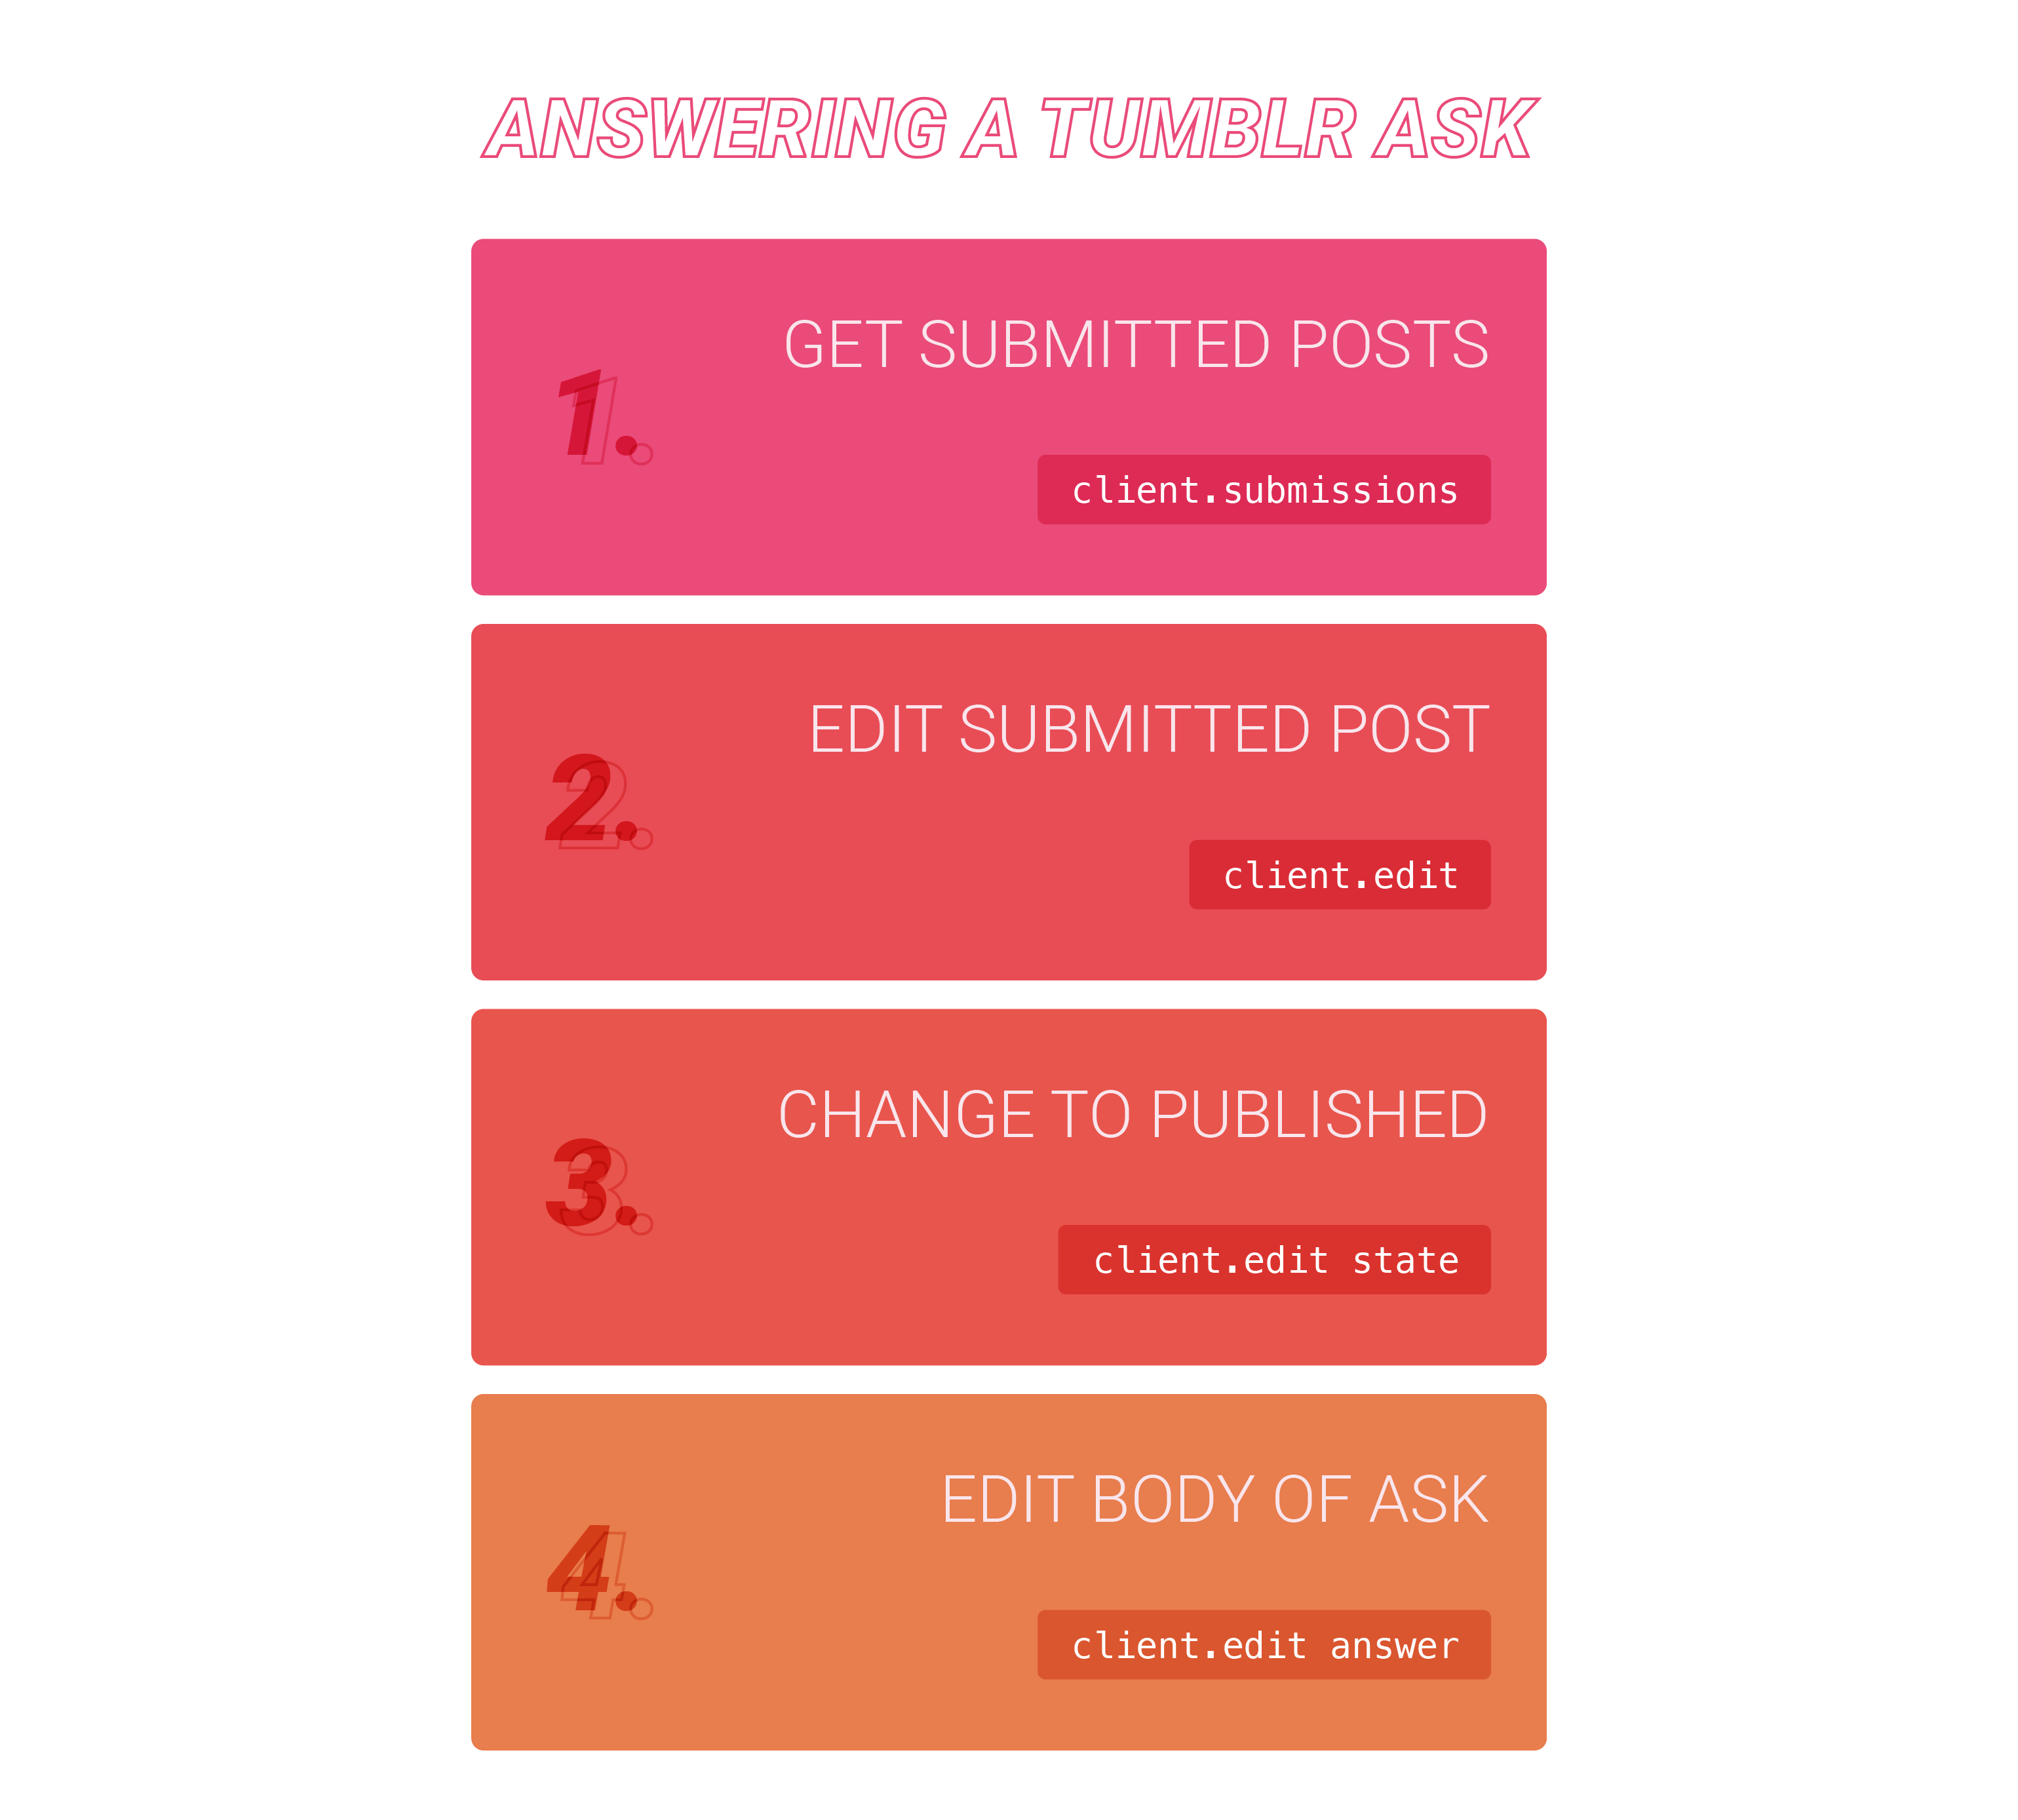
Basically, we're getting our submitted posts (which we already did with GetSubmissionPostsAsync), editing that post (with EditPostAsync), and changing the submission state from submission to published (with PostCreationState.Published).
The little "hello" string is simply the response to our question post. This is what will be published!
If everything went correctly, when you start your program, your bot should answer you!
NOTE: This bot only checks it's inbox once when the program starts. If you want it to continually check, you'll need to use a combination of
sleepand thewhileloop.
Closing
If you liked this tutorial, and you want to see more like it, please consider donating to help me out!